Tag Archives: strawberry plant diagram

Grow Strawberries: A Simple Pleasure

20 Nov

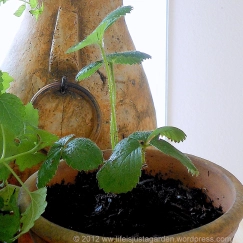
Strawberry plant growing in handmade terracotta pot.

Red, Juicy and Flavorful!

Is there anything better than warm, juicy strawberries picked right from your own pot?  I think not!  They are soooo easy to grow you’ll wonder why you ever put up with the mealy, tasteless variety found in grocery stores!

.

.

.

.

Strawberries can be grown in hanging pots, regular plant pots, directly in the soil, or in strawberry pots.  The latter is so charming it deserves your consideration.

Here is what you’ll need:

.

.

Materials

1) Terra-cotta or glazed ceramic pots.  Larger pots can house more plants, so you will harvest more berries.  Don’t worry about having too many berries; everyone you know will want some!

2) Sandy, loamy potting soil.  Strawberry plants love good drainage.
3) Top quality compost and a bag of 10-10-10 nontoxic, organic fertilizer (provides the nitrogen on which strawberry plants thrive).

4) Sunny spot – at least half a day of direct sun for a plentiful yield.  Some of my strawberry pots sit next to my other sun-loving plants: tomatoes, basil, cucumbers, squash and peppers..

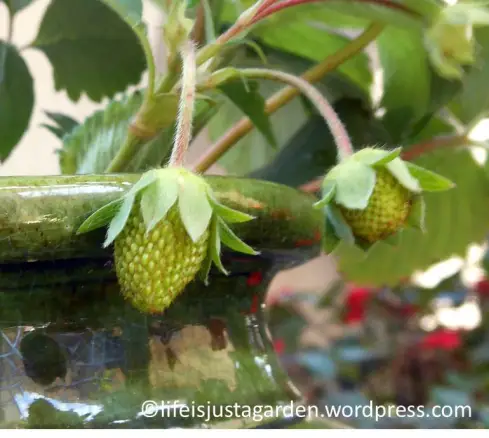
Green Unripe Strawberries

5) Which strawberry plant?  Each variety has its fans.  June bearers produce once a year while ever bearers, contrary to their name, produce 2-3 times a year: spring and late summer.  A  third variety called day neutral, which produces continuously from June through September.  Some say the June bearer has a larger, juicier berry but the ever bearer’s has more concentrated flavor.  Why not plant one of each and see which you favor?

..

Planting

Mix organic fertilizer (I like Miracle Grow’s organic fertilizer) and organic compost into your potting soil and fill the pot with the mixture..
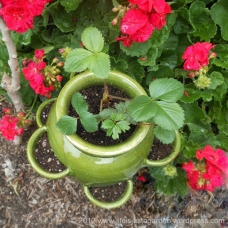
Strawberry pot with cups for runners.


For strawberry pots, also fill the outer “cups”, taking care not to pack the soil too tightly (remember, good drainage!).


The purpose of the cups is to “catch” and root the long runners that strawberry plants throw out.  These runners become new “daughter” plants. Diagram of the parts of a strawberry plant.
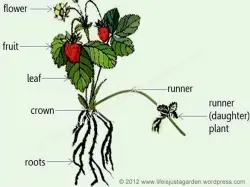
However, for the first two years you can snip off the runners so the plants can focus all of their energy on growing berries.  During this time, you can place mature plants in the top and the cups.

..

.
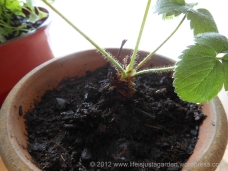
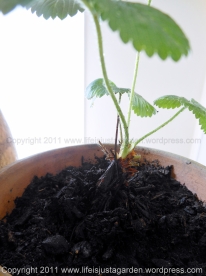
Crown of strawberry plant.

.

Be sure to plant the crowns well above soil level or your plants will languish.

.

.

.

.Replace your strawberry plants every three to four years because eventually their vigor and production decline.  Remember those runners?  Strawberry plants politely propagate themselves like crazy .  When you need new ones for the following year, remove the mature plants from the cups and plant them in the tops of their own pots.  Allow them to throw out runners, which will spill over and root in the cups.  Once solid root systems have formed, simply clip the runners to set them free from their parent plants and either place them in their own pots or let them thrive where they are for several years, until you need them to produce fresh plants via their runners, continuing the cycle.

.

Now what could be easier and more delicious than that?!..

.Wide Strawberry Pot

Related article: Got Strawberries?  Top 5 Things To Know!

.

.

.

Top 5 Strawberry Things To Know

12 Nov

Related articles: Grow Strawberries: A Simple PleasureLady Bug Love

Diagram of a strawberry plant with runners.

.

.

Strawberry plants are easy to grow if you attend to a few important things.

.

.

1) Avoid water-logged roots.  Strawberry plants require very well-draining soil.  Use potting  soil for containers, which drains faster than garden soil, adding perlite if necessary.  If planted in the ground add compost and even a bit of sand, although this can be time-consuming and, well, a lot of work.  An alternative is to grow them in mounds or rows raised 4-6 inches above soil level.

2) Keep parasites controlled.  Check for them regularly on stems and the undersides of leaves to prevent an infestation that weakens your plants.  If you notice insect damage but don’t see insects, carefully dig down 2-3 inches near  the roots or slowly flood pots with water for a few minutes to see what crawls up for air (this is my favorite technique and very effective because it kills some of the pests and I can pick some of them off the surface).   Key culprits include:

  • Aphids– a sharp blast of water will knock them off and and kill most of them.  Well-stocked gardening stores sell hose attachments that shoot water up so you can get under leaves (I foundthese helpful for controlling aphids on my lemon and lime trees).   If, like me, you are too lazy to keep this up, use Plan B: encourage lady bugs to take up residence in your garden.  To do this you must resist the urge to use chemical pesticides because along with the aphids you will kill any natural.predators that may be growing (along with bees and many other beneficial bugs).  If you see ants on your plants, they are “farming” the aphids.  In this fascinating symbiotic relationship (that you don’t want in your garden) the ants protect the aphids from predators and take some of the honeydew in return (sounds kind of like the mafia, no?).
  • .Loopers and caterpillars – you can pick them off on cool days or in the morning and evening, when they surface from the soil around the roots to feed.  Again, I am far too lazy to  keep this up so I use the hose to apply a solution containing Bacillus thuringiensis (the label will probably call it Bt).  This is by far the most effective and easiest method.  It paralyzes their “gut” and they cannot continue to feed on your plants.  I  use this to control caterpillars on my bougainvillea, geraniums and petunias too.  You’ll need to repeat application every 7-10 days or so but it is well worth it.
  • Slugs – place containers of beer (I use empty plastic yogurt containers) so that the lip is even with the soil.  Slugs and snails are attracted to the fermentation and will crawl in at night and drown (Hotel California).   If their soggy bloated bodies are too much for you to deal with the next day, copper tape (which can be found in hardware and gardening stores) can be used as a boundary to repel them.  Another deterrent is anything sharp that can pierce or scratch their bodies (ugh) as they attempt to slime (er, crawl) toward your plants, such as crumbled egg .shells or even jagged mulch.

3) Plant crowns well above soil level.Strawberry Plant Crown Placement
Strawberry plants detest it when their crowns are too low and will languish with drooping leaves and stems.  It is better to err by setting them too high than too low (for location of crown see strawberry plant above).

4) Keep well fertilized.  Dark veins in light leaves?  Your strawberry plants have depleted the soil and are starving.  Solve the root problem (pun intended) by adding an inch or so of high quality compost, which will break down slowly for long-term continuous feeding.  Plants in this condition will also need a short-acting fertilizer (Miracle Grow makes an organic fertilizer that I like).

5) Take tender loving care of your runners if you are rearing them to be your next generation of strawberry plants.  Once they have formed solid root systems, clip then off and set them free in their own pots!